Refashioned Gift Card Bracelet
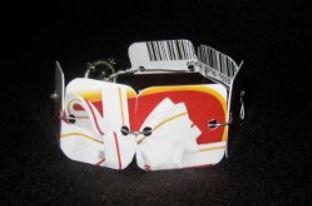
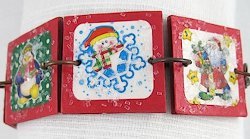
Gift cards are a popular gift during the holidays, and now you can find use for them even after they're empty by making a Refashioned Gift Card Bracelet. This DIY fashion tutorial shows you with a series of easy steps how to take a fun design and turn it into a part of your wardrobe. You'll save so much money with this refashioning project, and you know that there's no jewelry like this already in stores.
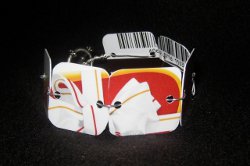
Materials:
- 1 zero balance gift card or credit card
- 20 to 26 gauge wire - 12” in length
- Spring ring & eyelet or lobster clasp and jump ring
- 1/8” hole puncher or drill
- Wire cutter
- Grease pencil or fine tipped marker
- Sharp scissors
Instructions:
- Gift / Credit cards are approximately 3 3/8” by 2 1/4”. Using your marker, draw 1 line down the middle on the short side and 2 equally spaced lines (divide by thirds) on the longer side. This will give you approximately 6 squares each 1” by 1”
- Cut gift card into six equal pieces, each approximately 1 inch by 1 inch
- Round corners using scissors
- Drill two holes (or use hold puncher) into each piece across and lengthwise from each other
- Take your first card square and loop wire through the square, then the clasp, then the square again. Twist wire to secure in place. Long end of wire should protrude through the back of the card at this point
- Thread long end of wire from the back to the front of the 1st square using the opposing hole
- Add second square card by threading wire from the front of the 1st square through the front of the second square
- Repeat by threading wire from the back to the front of the second square
- Repeat steps until all six card squares are attached
- End bracelet by threading wire through the jump ring or eyelet and then through the square again. Twist wire to secure in place

How to Make a Refashioned Gift Card Bracelet
Find more projects and tutorials from Craft Designer Caroline Dunn.
Read NextHoliday Charm Bracelet

