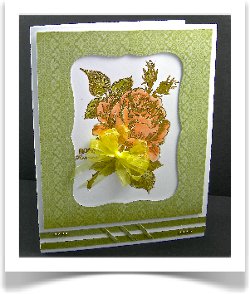
Rose Card
To make an elegant handmade Christmas card for someone special, try this Rose Card. Whether you're writing a thank you card or just sending good tidings to friends and family, this classic and refined pattern will be the perfect gesture. You'll be amazed at how little details can really make Christmas cards stand out.
Materials: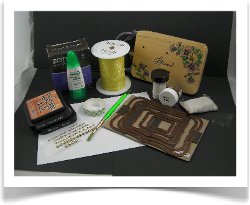
- White cardstock
- Designer Paper (DP) (not shown with supplies - refer to card)
- Cut 2 additional strips of DP at 3/8” x 5-1/2” (save scraps - see instructions)
- Gold embossing powder
- Anti static bag
- Versamark Ink
- Spellbinders Labels Eight
- Distress Inks (colors used here are Peeled Paint and Dried Marigold
- Ribbon (3/8” yellow used here) approximately 30”
- Glue dots
- Pop dots or dimensional tape
- Gold ball embellishments (8 tiny ones used here)
- Heat gun (not shown here)
- Craft mat (not shown here)
- Paint brush or waterbrush
- Adhesive of choice (Tombow Glue used here)
Instructions:
-
Cut white cardstock 7” x 11”, fold in half for card base
-
Cut another piece of white CS approx. 5” x 5-1/2”
-
Cut DP 5-1/8” x 6”
-
Cut 2 narrow strips of DP at 3/8” x 5-1/2” and save additional strips (see card picture)
-
Die cut Label die from center of DP (NOTE: it should be large enough to showcase your stamped image). You can save the piece that has been die cut and use it inside your card and stamp a sentiment on it.
-
On the 5”x5-1/2” piece of white CS, dust entire piece with Anti Static Bag, stamp your image using Versamark ink, dust with Gold embossing powder and heat set.
-
Rub a little Orange Marmalade ink on your craft mat and with your paintbrush, dip in water and start “painting” your image. You can go back with same color to add shading to your image
-
Repeat this step using (green) and color in your leaves, again using shading
-
Pop dot your DP onto painted image centering it. Trim edges of stamped image if necessary to center properly.
-
Adhere image to card front towards the top
-
With narrow strips of DP, adhere to bottom of card as shown
-
Add Gold Ball embellishments and any additional DP strips at right angles as show in center bottom of card
-
Create bow using Craft-Dee BowZ tool using7 loops for bow (see instructional video for “Multiple Loop” bows at www.craft-deebowz.blogspot.com)
- Adhere bow to rose using glue dots or preferred adhesive
Submitted by Donna Maligno for Craft-Dee BowZ
Your Recently Viewed Projects

Thanks for your comment. Don't forget to share!
SissieSass
Oct 31, 2018
How elegant is this card? I love that the rose is so bright and glittery. My favorite part is the piece of ribbon that pops off from the card. The added dimension puts a classy touch on the card and makes it more beautiful. Your color choices make the card even more appealing.
Report Inappropriate Comment
Are you sure you would like to report this comment? It will be flagged for our moderators to take action.
Thank you for taking the time to improve the content on our site.