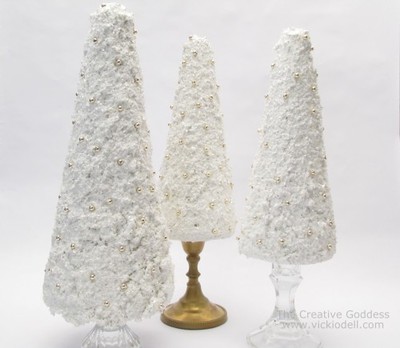
Hot Pink Tabletop Trees Centerpiece
Tabletop Christmas tree ideas like this are perfect for the modern chic household.

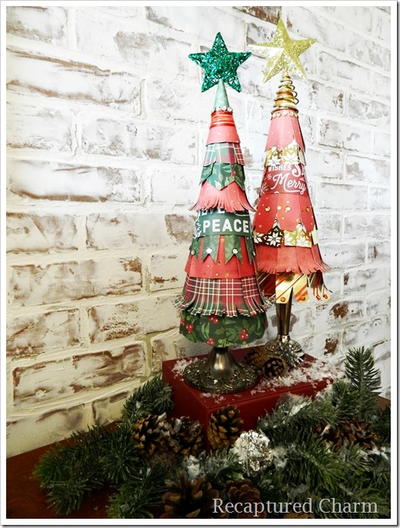
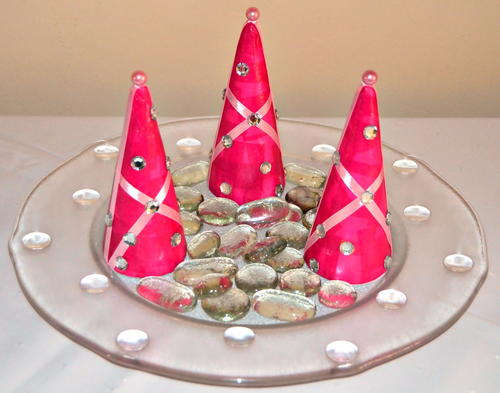
Make a gorgeous decoration for your home that doesn't quite follow a traditional color scheme. Go vivid with the Hot Pink Tabletop Trees Centerpiece. These easy DIY Christmas centerpieces are wonderful tabletop Christmas tree ideas for the dining room table or credenza.
From the Designer: "Break away from the traditional red and green when you make these cerise pink miniature Christmas trees. Displayed on a glass plate, these trees are the perfect centerpiece for a family dinner. It can also be used as part of the décor for a Christmas party at the office."
Estimated Cost$11-$20
Time to CompleteIn an evening
MaterialsGlass, Paper, Plastic
Primary TechniqueGeneral Crafts
Type of Paper UsedTissue Paper

Project TypeMake a Project
Materials List
- Three 5.4” high polystyrene cones
- Cerise pink tissue paper
- A5 sized ordinary white printer paper
- Three 2.4” long pink pearl head millinery florist hat pins
- Three 31” pieces of baby pink satin ribbon that is 0.2” wide
- Forty-five 10mm multifaceted clear round rhinestones
- Silk sewing pins
- Mod Podge
- Quick-drying craft glue (such as bostik clear)
- 10/32” flat paintbrush
- Standard scissors
- Pencil
- Round plastic lid that is slightly smaller than the base of the cones
- To display: glass plate and large clear polished glass pebbles
Instructions
-
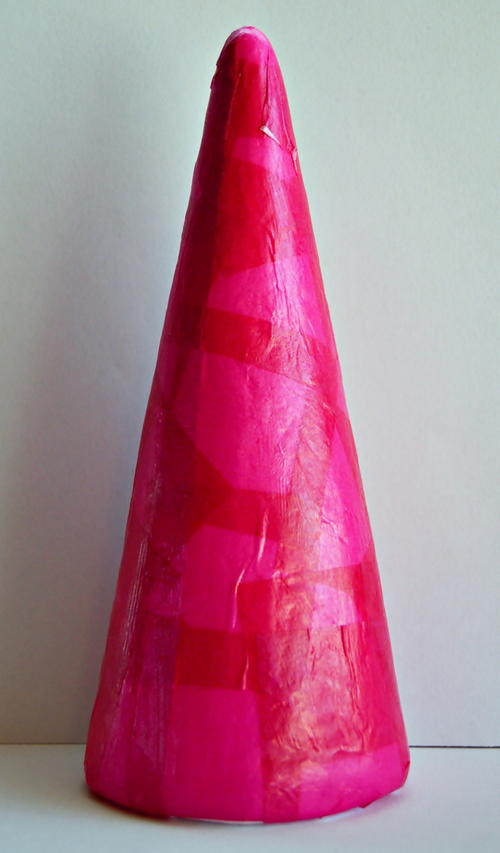
Cut the cerise pink tissue paper in small squares. Paint Mod Podge to the back of the first square of tissue paper. Turn the square over and put it in position on the first cone. With the brush, spread Mod Podge to the front of the square of paper, lightly applying pressure so that it will stick to the cone, and use your finger to gently rub out any air bubbles.
-
Repeat step 1 with the other squares of tissue paper, until the cone has been covered with the tissue paper. Do not cover the base of the cone, but make sure that the edge around the base is covered.
-
Do the same with the other two cones and allow all three cones to dry thoroughly before continuing to the next step.
-
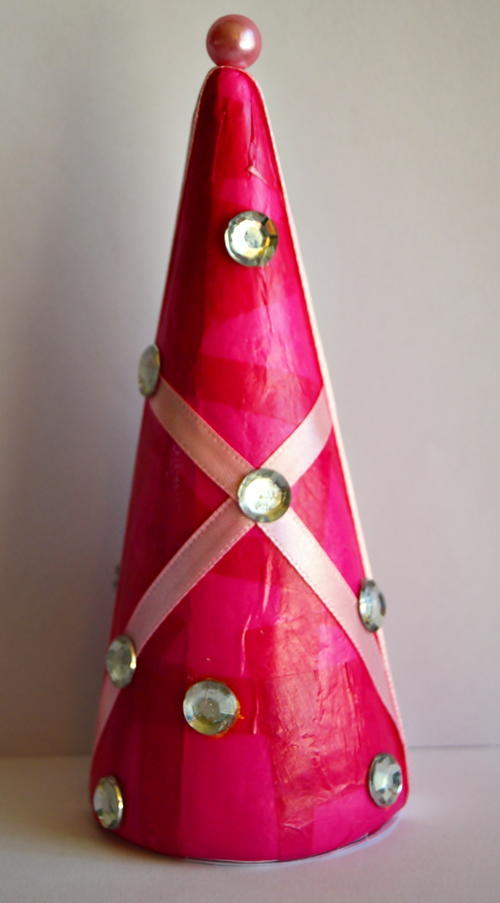
Take the first 31” long piece of ribbon. Use a pin to secure it to the base of the first cone. Wind the ribbon around the cone, using pins here and there to keep it in place. Use a hat pin to keep the ribbon in place at the apex of the cone, and secure the second end to the base again before cutting off any remaining ribbon. Glue 15 rhinestones in random places to add “Christmas baubles” to the tree.
-
Repeat step 4 with cones two and three.
-
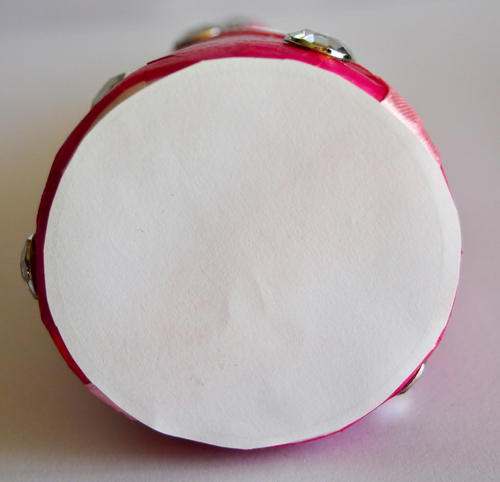
Use the plastic lid to trace three circles on to the white printer paper. Cut them out and glue a circle to the base of each cone to hide the ribbon ends.
-
Display on a glass plate with glass pebbles around the trees.

Read NextVintage Teapot Christmas Tree
Your Recently Viewed Projects

Thanks for your comment. Don't forget to share!
SissieSass
Nov 26, 2018
Who doesn't need a little hot pink in their life? I think this table tree piece is so cute and fun. I love that you chose such a bold and non-holiday color to use. I think it makes it stand out in a good way. I know my daughter would approve of this shade of pink.
mulberrygalprinces s
Aug 23, 2018
This is certainly different. They will catch people's attention and be a real conversation starter.every year my friend does her tree in a very untraditional and unique color. Last year it was purple. This may just the gift to give her this year. I am sure no one else will give her one like it.
Report Inappropriate Comment
Are you sure you would like to report this comment? It will be flagged for our moderators to take action.
Thank you for taking the time to improve the content on our site.