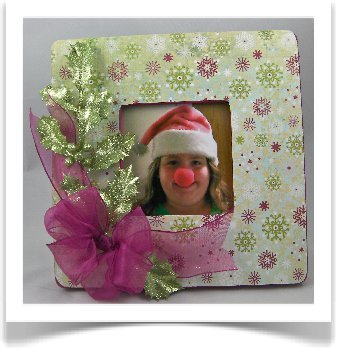
Designer Wooden Picture Frame
Whether you're looking to create a new DIY Christmas decoration or a homemade Christmas gift for someone special, you should try this Designer Wooden Picture Frame. Don't waste money on expensive store-bought frames when you can make your own that fits your tastes. You can make a picture frame that's both personal and festive.

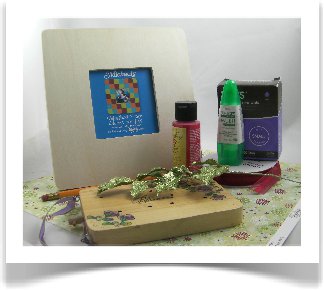
Materials:
- Wood frame from craft store (Note: keep shape simple for best results)
- Glue (I used Tombow for this project)
- Designer Paper (use a double-sided DP for better stability)
- Craft paint to coordinate with Designer Paper
- Photograph (not shown here)
- Glue Dots
- Craft-Dee BowZ bow making tool (www.craft-deebowz.blogspot.com)
- Ribbon to coordinate with project (ribbon used here is 1-1/2” wide x approximately ???? long. I suggest a wired ribbon for maximum effect on this project.)
- Holly glitter stem (from craft store) or desired embellishment)
- Pencil
Instructions:
-
Paint outer and inner edges of wood frame with craft paint, let dry
-
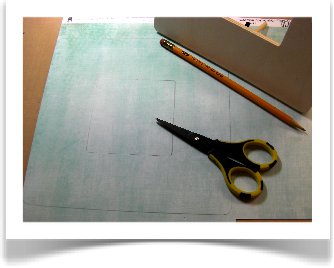
Turn Designer paper face down on work surface, place wood frame on top and trace outer and inner edges with pencil
-
Cut Designer Paper on the inner side of your trace marks and glue Designer Paper to your frame
-
Adhere photo into frame opening
-
Adhere Holly glitter stem where desired - I chose lower left corner in order to “ground” my frame
-
Create bow using Craft-Dee BowZ tool using 4 loops for bow (see instructional video for “Multiple Loop” bows at www.craft-deebowz.blogspot.com)
-
Attach bow to lower left of frame overlapping the holly stem. Arrange bow in pleasing manner using glue dots where necessary to keep loops in place
Submitted by Donna Maligno for Craft-Dee BowZ
Read NextFestive Soaps