Altered Christmas Organizer
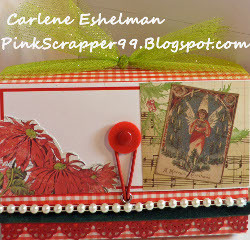
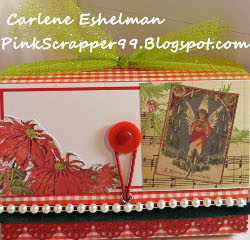
Show off your creative side and make an Altered Christmas Organizer from Carlene Eshelman for the holiday season. Mixed media art allows you to use a variety of materials to create an unexpected and unique object. Use this file to store recipients and paper scraps.
Materials:
- 4-1/2” X 6-3/4” small expanding file
- 1-1/2” X 7” red strip cardstock
- Ek success decorative border punch
- Pointsettia flower on cardstock
- 3” X 3” scrapbook paper for back ground
- 4” X 6-1/4” scrapbook paper for back
- 1-3/4” X 2-1/2” christmas image
- 18” green glitter tulle
- 7” green velvet ribbon
- 7” white flat back pearls
- Liquid glue
- Glue gun/sticks
Instructions:
- Use liquid glue to cover top right corner of expanding file.
- Layer Christmas image in top right corner.
- Glue poinsettia flowers to left corner of file cover.
- Use border punch to punch red cardstock strip.
- Use hot glue to adhere border to bottom of file.
- Layer green ribbon on top of border.
- Layer white pearls over green ribbon.
- Use liquid glue to adhere 4” X 6-1/4” paper to back of file.
- Tie tulle to top gusset of file, and tie a knot.
How to Make an Altered Christmas Organizer:
Your Recently Viewed Projects
SissieSass
Mar 31, 2018
Did you take your Christmas decoration from a card? I love making crafts with my older cards. I have some special ones with memories from when I was a child that I just hang up every year. Inside each are notes from family members that are no longer with us, but they can still participate in the holidays with a card that they sent while there were still here.
Report Inappropriate Comment
Are you sure you would like to report this comment? It will be flagged for our moderators to take action.
Thank you for taking the time to improve the content on our site.

