This project was submitted by one of our readers, just like you.
Pottery Barn Knockoff Wreath

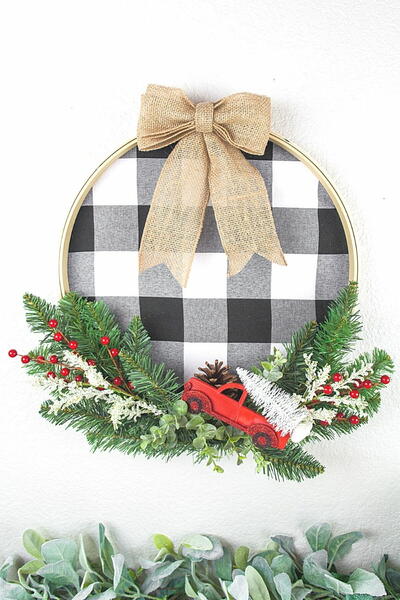
"Do you want a cute unique Christmas wreath but don't want to spend a fortune? Check out our Pottery Barn Knockoff Wreath. This wreath is the CUTEST and is so easy to make! Everyone will be asking you where you got it from! What we love most about this craft is the detail. The glitter on the little house and the snowy look of the branches just gives you all the holiday vibes. Make yours this holiday season!"
Primary TechniqueFlorals/Wreaths

Materials List
- Cricut Maker Machine
- Cricut StongGrip Cutting Mat
- Cricut Knife Blade + Drive Housing
- Scissors
- Masking Tape
- Heavy Chipboard
- Fine Glitter in colors: silver and white
- 3oz can of Krylon spray paint in gold
- Floral wire and floral tape
- Super 77 Multi-Purpose Adhesive (or the spray adhesive of your choice)
- 3 Bottle Brush Trees
- 19” Floral Hoop
- Greens garland
- Glue Gun and glue sticks
- white acrylic paint and foam brushes or paintbrushes
- Thick 2.5 inch wire ribbon
- Exacto knife
- School or craft glue
- Hole Punch
Instructions
-
When making your Pottery Barn Inspired wreath you will want to start by spraying your floral hoop with gold spray paint. You will want to get an old box or some newspaper to lay underneath it to catch all the overspray. You will want to lightly spray the floral hoop. Let this fully dry. Once the hoop is dry you will want to spray it again. You want to repeat this process until the floral hope is completely covered. Allow this to dry.
-
First, you will want to gather all your Cricut supplies from the supply list. Once you have gathered your supplies you will want to turn your Cricut Maker Machine on. Please note for this project you must use a Cricut Maker machine. You Will Also Want To Download The Free Cricut SVG File At The Bottom Of This Post And Save It To Your Computer.
-
You will then open Cricut Design Space and click “New Project” Select the “upload button” on the left-hand panel. Then click the “Upload image” button. Press the “Browse” button and find the SVG file that you saved for this Pottery Barn Inspired Wreath. Add tags for your project, and hit “save” (bottom right corner).
-
On the next screen you will want to select the image you just uploaded and then press “insert Images” (Usually found bottom lower-left corner)
-
Before moving on, you want to make sure your size is set with these measurements. (W 32.5, H 10). Also, set the position of your project to X 0, Y 0
-
Once you have ensured the proper measurements then you will select all and then press the ungroup button: Once they are ungrouped, select the first set of objects and press the attach button. (There are 3 sets total) Then proceed to do the same for the second set of objects, and also the third.
-
Now it is time to hit the “Make It” button (usually the top right corner) Select the material size to 11” x 11” since we are using a thick chipboard. Then press the green “continue” button in the lower right corner.
-
Inset your knife blade into your Cricut Maker Machine and prepare all three of your StrongGrip Cricut mats. To do this place one sheet of the heavy chipboard in the upper left-hand corner of the mat. Tape this down on the edges with your masking tape.
-
Once your Cricut mats are prepared, proceed to Design Space and select Heavy Chipboard 2.0 (Next, follow the instructions within the program when to load the machine, and then proceed to cut. Your machine will give you an estimated time for the cut after it makes the first pass over the chipboard.)
-
Once the cutting is finished you will want to unload the mats from your machine and remove your project. You will have a house front and a back, 2 sides, 2 pieces for the roof and 19 stars ready to go! You will want to keep your Exacto knife handy to just in case the machine doesn’t cut the entire way through one of the cuts.
-
With a foam brush or roller, you will want to paint (with your acrylic white paint) the front and the back of all the chipboard pieces. You don’t have to paint the back of the front piece because no one will see it. Let this dry completely.
-
Once the house is dry, lay the pieces of your house out and start gluing the front, bottom and sides together.
-
When you are applying glitter to your Pottery Barn Knockoff wreath, you will want to get an old box or newspaper to catch all the extra glitter. First, you will want to spray the sides and the front with the adhesive spray. Then sprinkle the white glitter on the pieces of the house.
-
Punch holes in the bottom of all the stars, except for the smallest ones. Then spray these with the adhesive spray and sprinkle with the silver glitter.
-
After the stars dry, attach the floral wire through the bottom of the star and then secure it with the hot glue making it a floral pick.
-
Next, spray adhesive to the top of the house (roof) and sprinkle it with silver glitter. Attach the back of the house to the front and the sides. Once the roof is dry, use craft glue to attach it to the house. Use your hot glue gun to add the smallest stars to your bottle brush trees.
-
You are now ready to assemble your Pottery Barn Inspired Wreath! You will want to gather all your wreath materials. First, you will want to cut your garland in half and secure half of the garland to the left side of the hoop with floral wire. Then cover the wire with your floral tape. Repeat this same process on the right side.
-
Attach the stars by wrapping the wire around the hope. Use your hot glue gun to secure it if needed. Add the house to the center of your wreath with hot glue.
-
Then glue your three bottle brush to each side, then attach your bow to the top of your wreath!
Read NextShimmery Pine Cone Wreath


