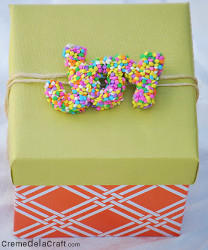
How to Tie the Perfect Holiday Bows
For gifts, wreaths, or other decorations, the look of your bow can make all of the difference.

When the Christmas season rolls around each year many people start to think about how to make the perfect wrapping for a gift. Several months before the season is underway a great project is to think about the type of wrapping you would like to have and particularly the type of bows you would like to have on each gift.
A bow is a very unique touch that really finishes off the wrapping and puts an exclamation point on your wrapping job. Gifts do not look as compete without a bow around them or on top of them. Bows make a statement. They set the gift apart from others with their unique style and elegance and really set their own kind of ambiance for the gift you are giving.
Although it is easy to go buy a pre-made bow at the store, it is almost just as easy to make your own by following the instructions for our many free craft projects that give bow tutorials on how to make all types of different bows.
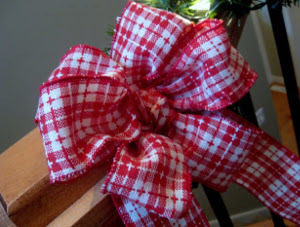
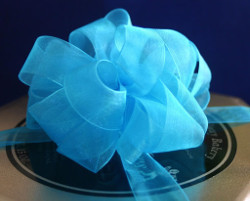
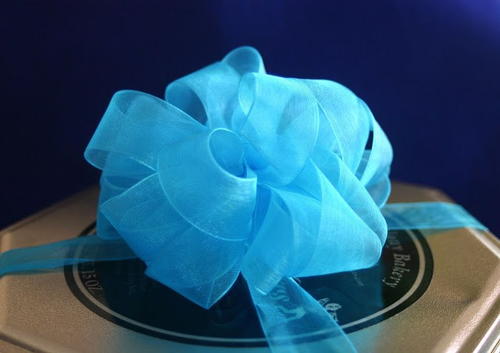
Ravishing Ribbon Bow
A Ravishing Ribbon Bow is a really easy craft to make for DIY Christmas decoration ideas. This simple tutorial shows you how to do bows with ribbon in under an hour so that you have enough time for your other holiday activities. Tie ribbons in loops and secure them with glue or pins so that the design stays in place. You may decide to make a DIY hairbow in the future, and you can reuse this DIY gift bow by adding a pin to it for a handmade hair accessory. A DIY Christmas project that teaches you how to tie the perfect bow is truly the best gift anyone can have.
-
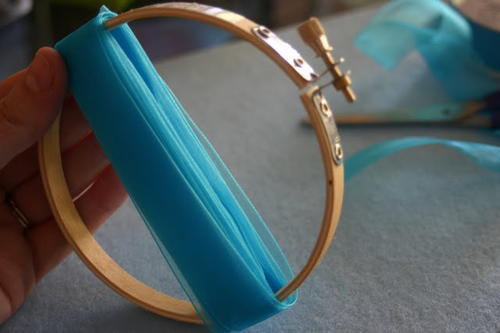
Wrap your ribbon around a 4-inch embroidery hoop (just the outside piece) about 10-15 times. We ended up wrapping 13 times.
-
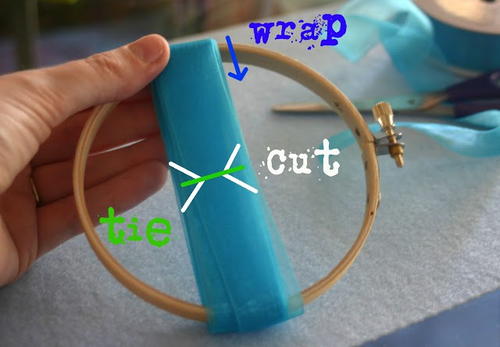
The ribbon slides around easily and is a little bit difficult to cut. Measure and mark the center and then cut out triangles on both sides. You may have to do this in layers (first the top half, then the bottom half).
-
Using a small piece of ribbon (or a twist tie, pipe cleaner, piece of wire, etc.), tightly tie around the center. If you are using ribbon, make sure to tie it so that the ends tie in the back where you first started wrapping.
-
Make sure the hoop is open. Slide the tied ribbon off of the embroidery hoop. Notice how in the picture below the bottom is up. You may want to trim those three loose ends now to keep them from sticking out later.
-
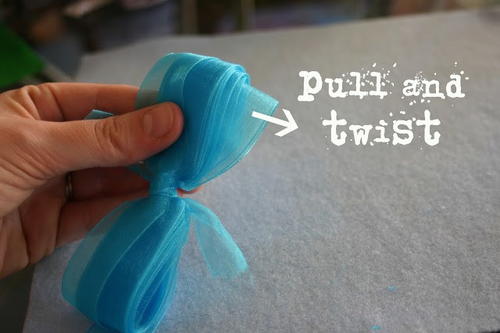
Make sure the bottom is down. Start with one side and carefully pull out the innermost loop and twist it away. Keep pulling out the inner loops and twisting in opposite directions. I ended up alternating and pulling about half of the loops to the right and half to the left. Repeat this same process for the other side.
-
At first, the bow might look a little flat. Keep pulling and twisting the loops until you are happy with how the bow looks. You can also hold the bow by the back middle and shake it out to fluff it. You can attach the bow with a safety pin, paper clip, hot glue gun, or even tape. You can reuse the bow, or save the ribbon and use it later for something else.
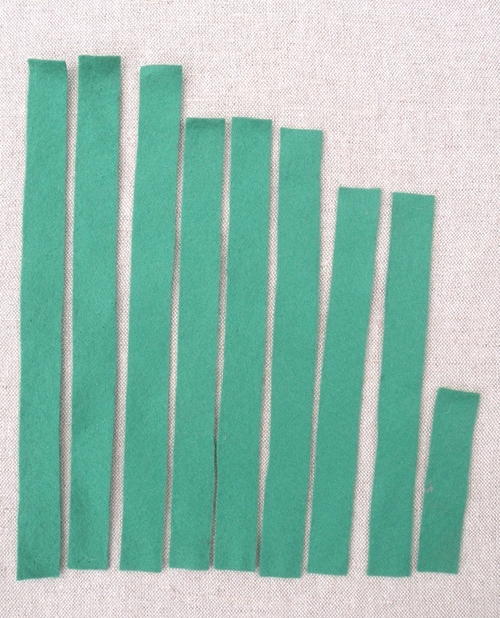
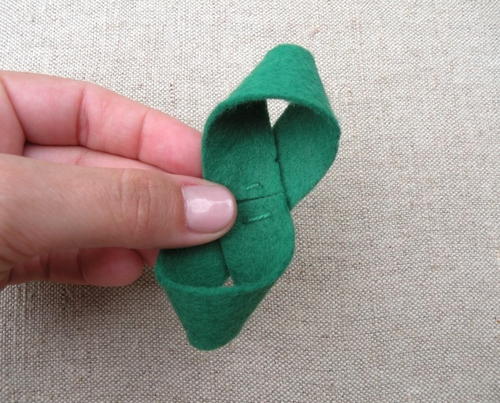
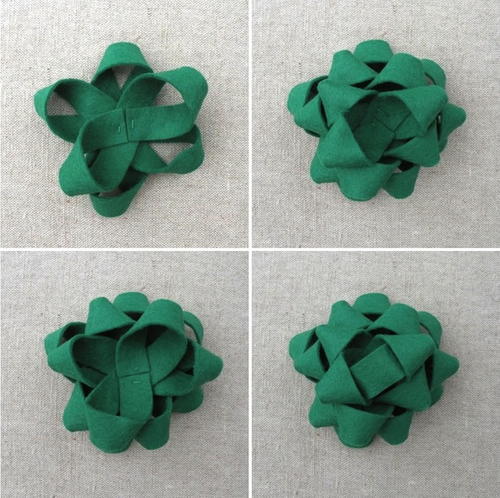
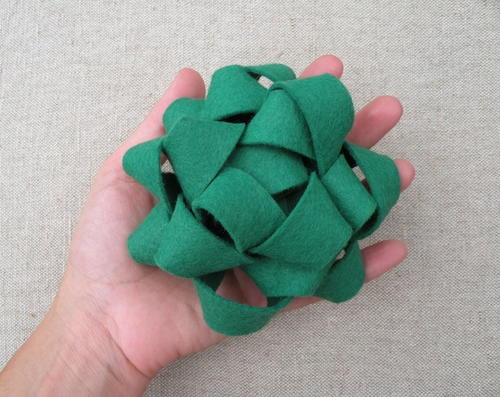
Felt Christmas Bow
With any color felt you can create "eco-friendly" bows for your gifts. Felt Christmas bows are created by folding felt stripes into the form of a figure eight. Layer them on top of one another to create the perfect bow!
-
Cut a felt page lengthwise into 9 strips. Each strip should measure 3/4 inches wide. Leave 3 strips full length, 8.5 inches long + cut 1 inch off 3 of the strips + cut 2 inches off 2 of the strips + cut the last strip down to 3 1/2 inches long.
-
Twist each strip to form a loop at both ends + sew it in the center. Shape the shortest strip into a circle + secure it with a glue dot.
-
Layer the strips from longest to smallest, making sure you space each set evenly + carefully. Finally, stick the loop into the center. Once they are grouped sew all parts together.
-
You’re done. You can use the bow as is for gift wrapping or you can add a pin to the back to wear it with your favorite blouse. You can transform this bow into a headband + clip + comb or anything else you’d like. You can also make them with recycled paper, like a map + magazine + newspaper or vintage paper for a nice variation.
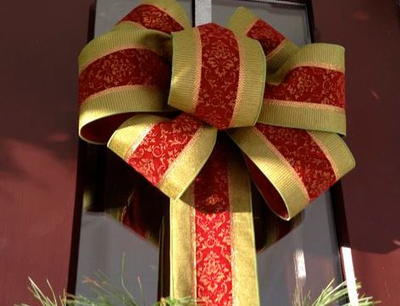
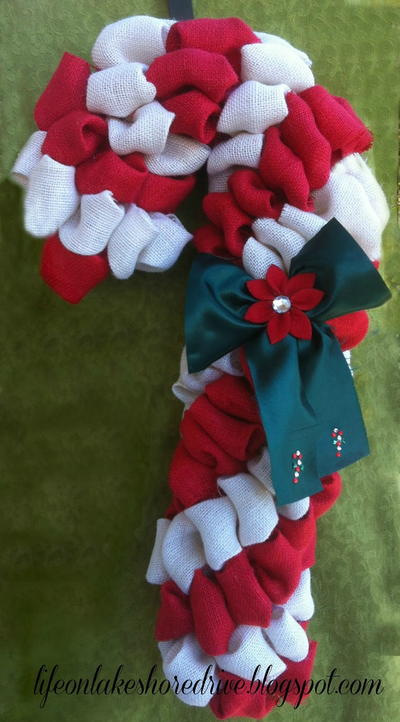
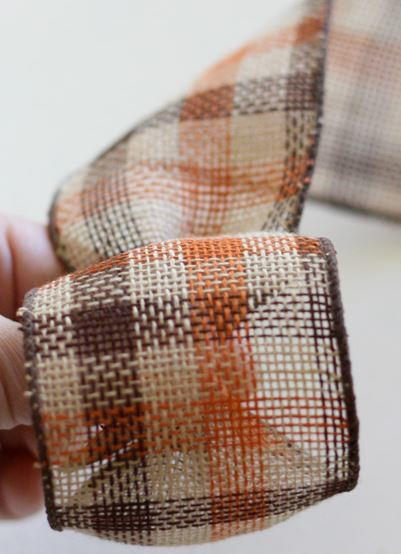
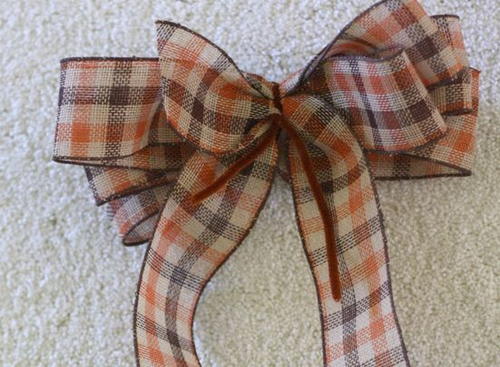
How to Make a Large Bow for a Wreath
-
The first thing you do is make the center of your bow by creating a small loop. Keep your thumb inside the loop, holding down the end of your ribbon as you make the rest of the bow.
-
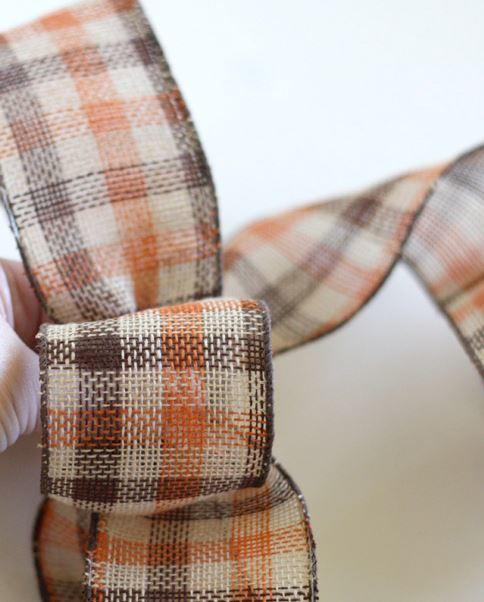
From that center loop, create a bigger loop on each side. Going back and forth while holding the center together.
-
This ribbon was easy because it was the same on both sides. If you are using a wire edged ribbon that has a design on one side, you will have to twist the ribbon at the center of the bow, as you begin to make the loops on each side. I make 4 loops on each side. I try to make them all the same size, but sometimes that doesn’t work and that is why we love the wire edge on the ribbon. To finish off the bow create one large loop that goes down and will loop back up to the bow.
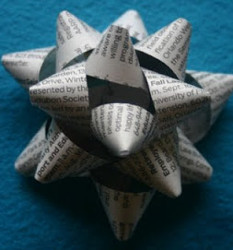
Good as News Bows
If you're looking for crafty ways to recycle old newspaper, Good as News Bows are a great option. This tutorial shows you how to make gift bows using old newspaper or scrap paper with scribbles on it. The kids can join in on the fun by doodling their best designs on these paper bows to make a gift bow that is all their own. Making bows with ribbon is fun, and when you are done, you can put them on your DIY Christmas gifts to give them a real homemade look.
-
First, cut the paper into strips 8 and a half inches long and 3/4 of an inch wide. If you have a paper cutter this step is very quick and easy. You will need 5 – 8 strips per bow.
-
Next, fold the strip in half to mark the middle. Then fold back and glue down each side with a hot glue gun, or another instant adhesive. Scotch tape would also work well. Try to keep the ends somewhat pointy.
-
Once you have made all of these figure 8 petals, start gluing them one at a time. Glue down the first 3 petals so that you have what looks like a 6 petaled flower with a gap in the middle. Next, add the last two folded up inside of the others. You can use any number of petals. For the pink bows I used 5, for the blue bow I used 6, and for the newspaper bows I used 7.
-
For thicker paper (like regular printer paper or scrapbook paper) it seems to work well to use only 5 or 6 petals. You can experiment with different numbers of petals and different sizes of the strips. I found that as long as they fit, the more petals you use the better it looks.
-
You can assemble felt bows, silk bows, paper bows, and many other types to really make your gift stand out under the tree at holiday time. The great thing is you can also use these ideas to make bows for birthday presents and other types of gifts and make your presentation to others truly unforgettable.
What is your favorite type of bow to make? Why do you like this one the best?
Read NextFilm Strip Pom Poms