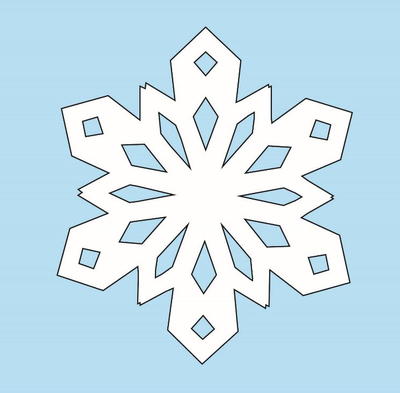
How to Make Paper Snowflakes
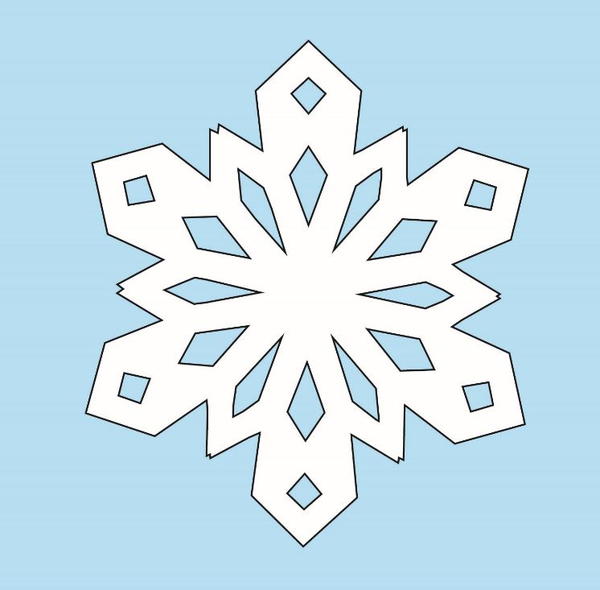
Learn How to Make Paper Snowflakes with this step-by-step tutorial. Paper snowflakes make phenomenal DIY Christmas decorations and can be kept up all winter. This snowflake template is also easy enough for kids even though adults will love making paper snowflakes, too. Making a paper snowflake will bring you back to your fun childhood as well. Just like real snowflakes, snowflake patterns are all different. Experimenting with different cut-outs and designs is just as exciting as seeing these beautiful Christmas decorations hung up around your home.
Because it's paper, you can always use different colored or weights of paper to see what happens. Adding glitter, stickers, or other embellishments is another fun aspect of making paper snowflakes. Every child should know how to make paper snowflakes, and Christmas crafts for kids like this tutorial are great ways to spend time together as the hectic holidays approach. They are fast, easy, and fun, making them the ideal craft for Christmas, kids, and adults.
You can get the full infographic by clicking the link below!
Estimated CostUnder $10
Time to CompleteUnder an hour
Project or Page Size8.5 inches x 11 inches

Materials List
- Plain white piece of paper (use other types and colors if desired)
- Scissors
- Stapler
- Pencil
- Glue
- Glitter, stickers, or other embellishments (optional)
- String or yarn for hanging (optional)
- Hole punch for creating hole for hanging (optional)
Directions for How to Make Paper Snowflakes:
Follow the steps below to learn how to make a paper snowflake that can be used as DIY ornaments on your Christmas tree, hung around your home, or attached to gifts.
-
Get a plain piece of paper, such as an 8.5" x 11" piece of printer paper.
-
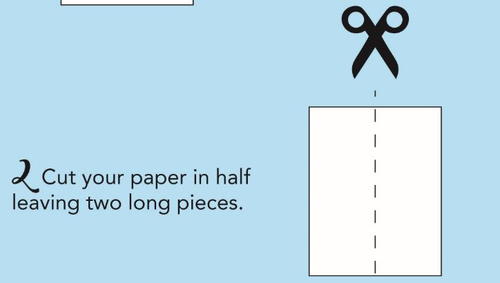
Cut the piece of paper in half lengthwise, leaving two long pieces.
-
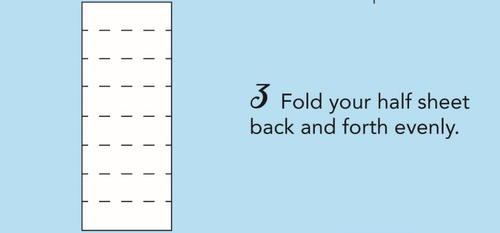
Fold the sheet into rectangles with the longer side of the paper as the widths of the rectangles. Start by folding it in half lengthwise to get the center crease and then folding the two halves into even rectangles.
-
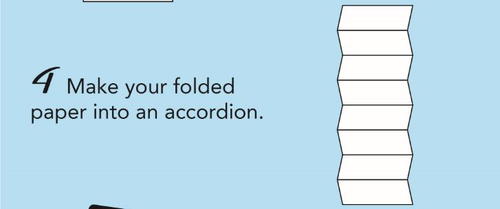
Undo the folds. You should have a long accordion shape.
-
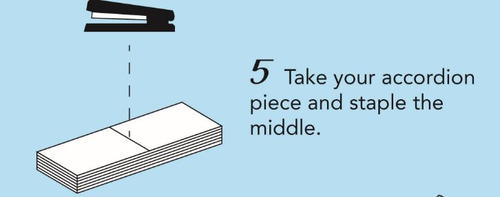
Fold it back into the accordion shape. Staple in the center of the folded paper so that the length of the staple is aligned with the width of the paper stack.
-
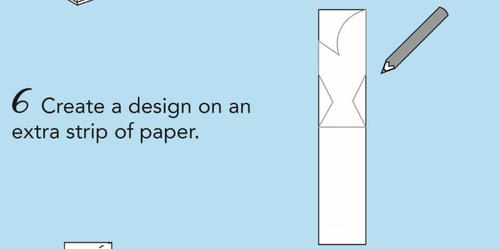
Create your snowflake design on a scrap piece of paper that is the same size as one of your stacked rectangles. Think of how snowflakes look to choose a shape. This may take a practice round first to see the final product.
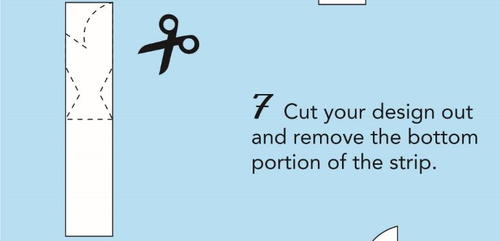
-
Cut out your design from the rectangle.
-
You should have a template for one "petal" of your snowflake.
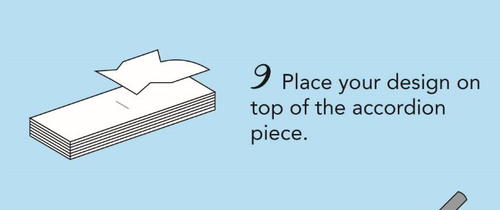
-
Place that piece on one-half and on the top of your stacked pile.
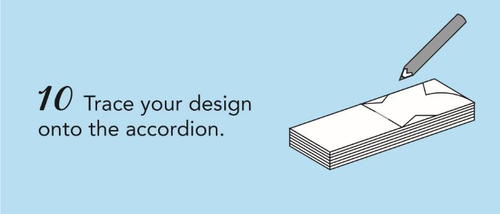
-
Trace your design on the folded paper stack.
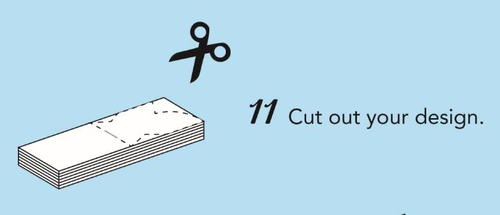
-
Cut out the traced design from the entire stack.
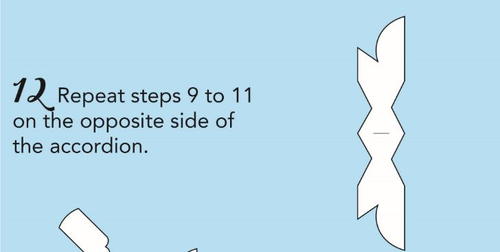
-
Repeat steps 9 through 11 on the other half of your paper stack. You will then have mirrored design shapes in your stack.
-
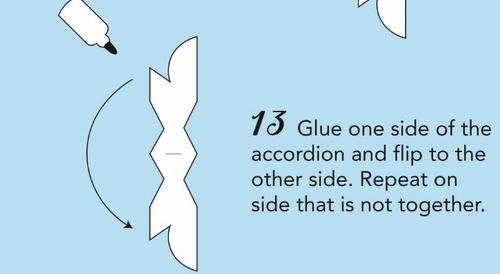
Glue one side of the accordion and flip to the other side. Repeat on the side that is not yet together.


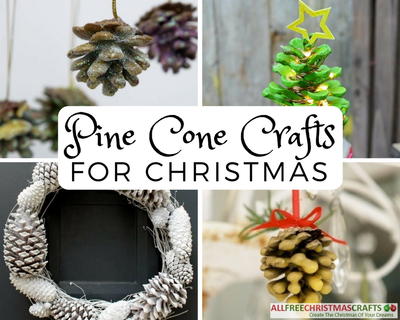
Read Next22 Pine Cone Crafts for Christmas
Your Recently Viewed Projects
Thanks for your comment. Don't forget to share!
SissieSass
Nov 26, 2018
Thank you for putting this tutorial in here. How many of you thought like I did that you could just pick up the paper and scissors and make snowflakes like we did when we were kids? I underestimated remembering where to cut. I am sure glad to find this tutorial.
Sigo
Oct 31, 2017
I just discovered this tutorial and thought I would give it a try. The tutorial is so well written and the technique, so simple. This image is my first one and I really love it! I used normal printer paper and it turned out excellent. I like the size of it, too. I know I will be making lots more of these. They will add a beautiful winter look to one of my windows.
Report Inappropriate Comment
Are you sure you would like to report this comment? It will be flagged for our moderators to take action.
Thank you for taking the time to improve the content on our site.