This project was submitted by one of our readers, just like you.
Corner Christmas Tree Shelf
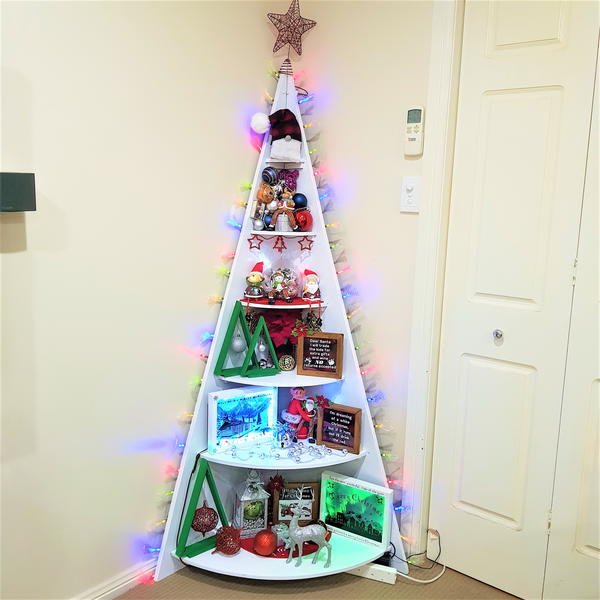
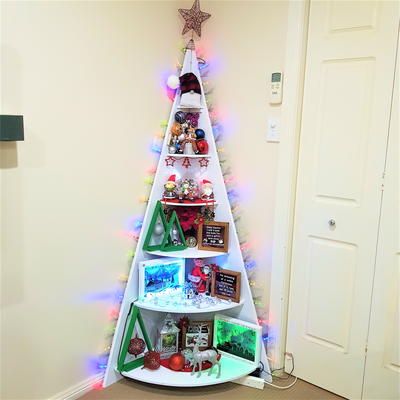
"I try and make something new for my home every Christmas. This year I wanted to make a shelf that would fit into the corner of my room and still pass as a Christmas tree. And after Christmas it could stay where it was I could just decorate it in another way. It can become a thanksgiving, fall or even a Halloween shelf you just change the decor to suit the occasion and the shelf is multifunctional."
Primary TechniqueWood Crafts

Instructions:
-
To start you will need a large piece of wood or plywood. The size on the wood will depend on the height and width of the shelf you want. If you want to duplicate this shelf all the dimensions are available on my website listed below. Add painters tape diagonally across the wood, this serves as the cut line and prevents the wood from splintering.
-
Lay the 2 halves side by side and draw a pencil line where you would like the shelves to be.
-
Using scraps of plywood cut stripes of wood, these will be your shelf supports. I left a gap at the front so the support is not so obvious once assembled.
-
Next, glue the supports to the sides using the pencil line as a guide. I used a nail gun to secure the glued supports so I did not have to wait for the glue to dry. It is not required for this project.
-
Cut a hole in the gap below the first shelf at the bottom, this is to add Christmas lights. If you don't have a hole saw, use a jigsaw to cut out a small square.
-
Square the two sides up together and drill holes for the brackets just under the shelf supports to hide the bolts. Put your bolts through from the front and secure them to the brackets with nuts.
Read Next10 Minute Winter Wonderland


